Sunday, February 20, 2022

Getting started with HTML+CSS at age 12

Our first Web Development session started when she had written her very first HTML page on her own using TextEdit and viewing the page in Safari. We agreed to have a little 15 minute session to have a look what she had made. I was really impressed by her enthusiam and motivation and we had a really good time for the next 1 hour or so.

We started by discussing the structure of HTML documents:

  • <head> part for meta stuff like <title> element that determines the title of the browser tab
  • <body> part for all the rest

No-one should be forced to use TextEdit, Notepad or the like for editing HTML code so before we started working on the code we installed VisualStudio Code, which is a free editor that a large part of professional developers use nowadays. It's a no-brainer, use it. Then we enabled "Format on save" from settings so that the HTML page will always be nicely indented so you can concentrate on the content.

Then we experimented with basic HTML tags like <h1>, <h2>, <ul>, <li> to get started. But quicly she wanted to have, you know, colors, fonts and other cool stuff so we discussed basic styling. I introduced two ways:

  • Use a <style> element (it's important to understand the concept of elements and that they can be nested tree-like) and include CSS style declarations within. In this option you'll use a selector like body to select where to apply style and then one or more style declarations within braces { }.
  • Use a style attibute directly in an element. This is not preferable because you'll end up with a cluttered document instead of a nice separation of style and content.

She started working on a page describing her pets (two chickens and a lizard!). 

We had such a good time that we also got to cover the topic of "how can I get my page on the Internet for reals". And for that you'll need to

  • Have your HTML placed on a server
  • The server needs to have a public IP. This is where we took a lengthy detour into networking. In home networks there's a router that has one public IP, while the local computers and devices only have a local IP and the router is doing NAT (network address translation) to allow the devices to connect to the Internet. But the problem here is that your laptop computer doesn't have a public IP and thus isn't reachable from Internet.
  • You should also have a domain name, such as blogspot.com, which then resolves into an IP address when your computer asks for the IP address from a DNS server.

Then we discussed the URL, which is on your browser's Address Bar. An "Internet URL" will look consist of

  • Protocol, such as https:// (tells the browser how to talk with the server)
  • Hostname, such as blogspot.com (resolved into IP address on DNS)
  • A path such as /images/cat.jpg or just / for the "home page" (tells the server which file should be served)

A local File URL on the other hand will look something like file:///Users/mila/Desktop/milannettisivu.html. I asked her where will the browser look for the page given that File URL. She got it right then: from your own computer.

But the best part of the session was when she told me that I'm a really good teacher. Made me so proud!


Wednesday, February 16, 2022

file:///Users/mila/Desktop/milannettisivu.html

We had a little "career discussion" with my daughter last Sunday. She already knows I'm working at a pretty cool workplace where we have, for instance, free candy and infinite amount of ice cream. So when she was pondering what could be skills that could land her nice summer jobs at an early age, I innocently suggested Web Development and starting with HTML. This escalated quickly into the following WhatsApps conversation.


So someone had actually watched a YouTube tutorial on writing an HTML page and got started. I was really proud! The URL of course had me smiling. Can you spot why its funny?

Monday, November 13, 2017

Threading: Consider it Done

Today we learned some threading. Threading is an advanced programming concept where the computer runs your code in multiple threads meaning that it actually does multiple things at the same time. It is known to cause headache to even the most advanced developers.

In our case, we learned all there's to know about threading the Husqvarna Viking Emerald 122 by watching a YouTube video.

This is how it looks when it's properly done.


I have to admit though that I would still be perfectly helpless if I had to do all by myself and would have to resort to the same YouTube video again. Luckily my daughter is up to the task now and is working on a miniature backpack for her teddy bear.

We also discussed our Unity learning project briefly and concluded that the "intermediate" roguelike tutorial is too hardcore for us and we'll have to find something a bit easier to work on. I have a feeling that it'll take a while before we'll talk about threading of the computing variety.

EDIT: You're probably dying for a great Threading Tutorial, so here's one!

Saturday, October 21, 2017

Unity: The Wrong Tutorial?!

Lately we've been going though the Unity 2D Roguelike Tutorial with my now 8-year old daughter who taught her mom to use Vim at the age of 4.

Well, it seems we picked the wrong tutorial... Not saying we're not learning though. It's just that the code that gets casually written there's like protected virtual voids:


... freaking hardcode object-oriented stuff! The kid is a brave one but come on, we're writing abstract behavior component classes that have virtual parameterized methods. Also, in some parts of the tutorial (like this one) nothing new gets added to the game, in the sense that you could actually see some results on the screen.

There are easy and fun parts too, like working with the Animator Controllers, and in these parts she gets engaged but in the hardcore coding parts we've now agreed that I do most of the work. And it's totally ok! For me, this is nice and easy, and I get to understand how Unity works. I just hope that she'll bear with me for the whole tutorial without getting totally frustrated with the protected virtual voids.

I was just about to rant that there are no easy 2D Unity Tutorials but ahem there seems to be at least this one: 2D Game Creation.

Now, should we abandon our work and switch to the easier tutorial?! Maybe I'll quickly skim through both myself and make the decision. Let see...


Tuesday, October 17, 2017

Coding in the Mediterranean

The weather in Finland at this time of year is not so nice. I wish we could transport Finland to the Mediterranean for the months of September to November. Until then, I'll have to tranport just my family there every now and then...


This is how we learn coding in the optimum learning environment, using my pretty new book Koodauspuuhat which comes with an erasable marker! Only in Finnish though, at the moment.

Sunday, September 24, 2017

Unity 4: BoardManager, Childhood, Mushrooms

Today we started on the Writing the Board Manager part of the Unity 2D tutorial. This is the first part of the video tutorial that involves actual coding. And some code there is! Defining inner classes, methods, tons of variables, nested for loops etc.

I no longer wonder why this tutorial is not Beginner but Intermediate level :) We wrote quite a bunch of code of which I understood 100% and she maybe 20% or so. But no worries, we'll keep on coding and make something fun. Understanding how it actually works comes second, hopefully.


This reminds me of my own learning days when I was about her age and learnt coding from the Commodore Vic 20 Manual. Like this:


There were tons of simple and progressively less simple computer programs that I just typed like they were written on the book. I had no idea what the program code meant but I just typed it anyway. And it was so exciting to finally type

    run

.. and see what happened! Then I started slightly modifiying the ready made programs and finally started to understand the code by the effect that my little changes had on the outcome.
So, I hope she can also learn that way. And I'm actually 100% sure it's all about motivation and repetion. If she has the motivaion, she'll learn.

Oh, and we found this mushroom on our backyard:


Should we eat it, yes? While driving to her football match she asked me what these mushrooms actually do to people. I told her that it does something to your brain and you'll see funny things. And if you eat too much you'll die. Immediately regretted mentioning the hallucinations. Had to make extra sure that experimentation is out of the question in case more information of the effects is needed.

Tuesday, September 19, 2017

Unity Sessions 2 & 3 - Prefabs

Our second session was successful, yet super short. We finished the animations tutorial video and managed to create something called an Animation Override Controller. It's used when you create multiple enemies which share the same state machine but have different animation frames. Cool, huh? At that point the urge to start creating cupcakes instead was unstoppable and cupcake time it was.


Today she wanted to continue the tutorials so we sped through the next tutorial video on making prefabs for game tiles like floor, walls and food. These "prefabs" are saved object that define how a tile (a static piece in the game) look and how it interacts with its environment. Like, can you walk on it or not.

The stuff we've done so far has contained lots of repetitive works (like making 8 different floor tiles in the exact same way) which is kinda tiresome for people like me, but has proven rewarding for my 8-year old who has learnt to take these steps like a pro, just by repeating them over and over again. She can now make a lot of prefabs in the blink of an eye!
At this point I guess we have now set up all the assets so that we can start programming. Can't wait! On the other hand I'm a bit concerned how she'll handle C#, which is the first object-oriented programming language she's ever touched. There's bound to be a lot of weird boilerplate around, but I hope it won't matter too much. It's all about motivation.

Friday, September 15, 2017

Unity Session I - Animation

I realised that we've started quite a few game projects before, which have all been abandoned at a very early stage. But this time we're gonna make it. I just know it :)

Ok, so we've started working on a Unity 2D Tutorial where we follow video instructions and try to do the same thing as the guy on the video. The idea is to create a simple 2-dimensional game with the Unity game engine. I hope that after we're done with the tutorial videos, we'll be well equipped to start writing games of our own. So far, I have very limited Unity experience and I need the video tutorial as much as my daughter, so this'll be a great learning experience for both of us. My advantage over her is that I'm a professional coder at Reaktor (yes, we're hiring in Amsterdam, Dubai, Helsinki, New York, Tokyo and Turku!). Her advantage is that she's young, smart and has an almost unlimited supply of free time to throw at the project.

We had our first session the day before yesterday and we had a good time. We managed to create some basic animations for the player character and a couple of enemies.


After creating a couple of animations from the sprite sheet (basically a set of images) included in the tutorial, she was able to complete the rest by herself. After the one-hour session, she seemed quite enthusiastic about going on but it was bed time. I'm pretty sure we'll continue this soon. Stay tuned :)

Wednesday, September 13, 2017

Unity

A couple of days ago my daughter announced that she wants to create games that run on her phone. REAL games. I tried to steer her back towards Scratch and the like but she was adamant that those won't do, as she's about to start making real games. 

DAD: It's going to be really really hard and you'll be banging your head against walls for hours trying to make something work"
GIRL: That's exactly what I want!

She described a pretty complex game to me, containing several minigames and a main story. Then she showed me some graphics that she's drawn on paper. Fortunately I got her to understand that she needs to start with something smaller first, before creating her masterpiece.

When she went to sleep, I started digging, knowing fully well that I'm not a game programmer and need to do some catching-up before I can help her in her endeavours. I downloaded Unity and made a good start of a Pong-like ball game. It was surprisingly fun and easy, so I guess we're gonna go on with Unity.

Today we did the first few clicks of the 2D Roguelike tutorial before it was bedtime. Fun times ahead!

Monday, March 13, 2017

Script Academy

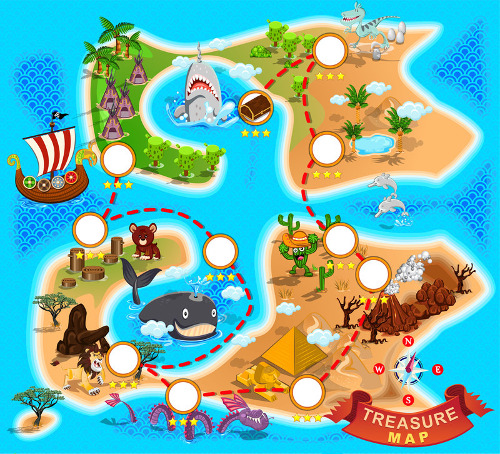
In a comment to a post on Reaktor Blog, a guy called Evgeni pointed me to a site called Script Academy. It's a site for kids to learn coding. And it looks promising! It has a treasure map too!


And it promises "After completing this course, your child will be able to create simple games and share them online." 

Well, we tried it with my 8-year old veteran coder girl who's used Vim at the age of 4 but since then gravitated towards other interests like 3D printing and playing the violin. Anyways, Script Academy starts in an easy way: Just click on buttons to generate Javascript that guides the (cute!) Owl to her baby. You can see the generated Javascript code and then run it. This was easy. Except the "run" button was a bit hard to find at first. For me. For the kid, it was peanuts.

Then came the part where you have to actually write the Javascript yourself. That didn't appear to be very hard, because example code was given. But here lied a surprising catch! Here's the result.


I guess there was a bit too much freedom this time. Give a kid a text area and she'll fill it with - well - anything on her mind at the time. I love her too!

Let's see if we return to Script Academy later!

Sunday, February 26, 2017

Black Hawk Down!

Btw, did you know I'm a helicopter pilot?

I have this 30€ helicopter from Clas Ohlson and I can totally land it on a dime. I mean, a two-euro coin. On a good day. But usually at least on the living room floor given enough room for maneuvering. My daughters, of course, share my passion for aviation.


I also have a spare chopper that has one of its main engines busted (not at all caused by a crash landing on my part). Or at least, had until today when my daughter wanted to build her own boat with a motor. So we had a long discussion about boat design, like, how should the weight be distributed (down), where the water line goes when it floats (dunna), where should the motor and the propeller be placed (down), how to make sure the axle hole won't leak water (grease?) and so on. Then she draw her boat with Tinkercad, with the intention to print it with our 3D printer. Here's how the design looks as of now. The design contains fittings for a little motor I had earlierly salvaged, that's something like 30*20*15 millimeters big.


You might notice that the motor compartment looks big for the tiny boat and the propeller placement isn't perfect: it'll be hard to get the whole propeller underwater. We are not boat engineers are we?

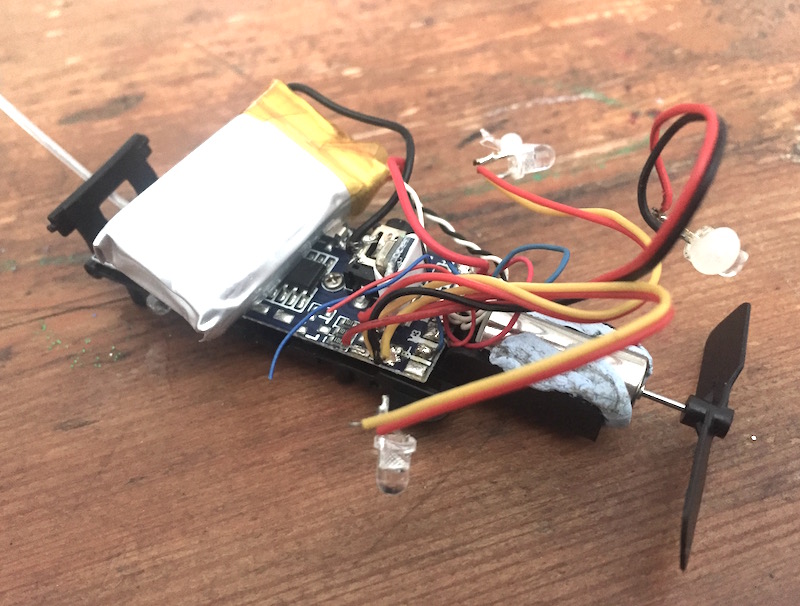
Then I remembered the spare chopper. It still had two (working) ultra-tiny motors, a control board and a Lithium Polymer battery onboard so it might be the perfect technical platform for the new little boat. So, we stripped all the unnecessary parts from the chopper and here's what we have now.


A nice radio-controlled motor-controller-battery package salvaged from a broken chopper! Let's see what comes out when we print the hull and combine it with the motor package. Do you think it'll float or sink?


Saturday, December 3, 2016

Going 3D with Tinkercad

I ordered a 3D printer for some of my own hobby projects and re-branded the purchase as a x-mas present for the whole family. Then I decided I need to learn some 3D design. I started yesterday with Fusion360 recommended by a colleague. I managed to create a shining box with rounded corners and could not remove the rounded corners. Gave me the same inadequate and stupid feeling I got with Photoshop before my friend taught me how to use it. 

So I "downgraded" myself to Tinkercad. And got it instantly. What a wonderful piece of software, running in my browser! This is what I created in a minute, as a proof of concept.


Today I told the kids about the upcoming 3D printer and they went mad. They already knew about such things and had seen one in the library. They wanted to print 3D Pokemons, of course, but I told them that the point is to create your own things, now just print stuff from the 'net. So today I showed Tinkercad to my 7-year-old and she was like "ok, looks a bit like Minecraft, what should I do in this world?". Well I told her that you can mess around just like in Minecraft. Plus the little bonus of being able to 3D print the result. BOOM! She went crazy.

Tinkercad was easy for me to learn and unsurprisingly it was easy for her too. So she crafted this little world in 15 minutes or so: 


After a bit she taught Tinkercad skills to her 5-year-old little sis too.


... and here's what the 5-year old came up with:


So, we had lots of fun and will have more tomorrow (bedtime came too early again). Cannot wait until the printer is delivered. I strongly recommend trying Tinkercad if you haven't done 3D design before or would want to let your kids try it too. It's online and it's free. A 5-year old can use it. You can too!

Have fun!

Monday, November 28, 2016

New Rules for Minecraft

In case you haven't noticed, Code.org offers tons of fun tutorials for wannabe coders. The newest thing is the Code.org Minecraft Designer. I decided to give it a try with my two daughters, now 7 and 5 years old. Minecraft is especially my older daughter's favorite game; she loves to create her own worlds from the simple 3D minecraft blocks. I thought that coding in the Minecraft world might inspire her. Guess what happened?

The tutorial starts as do many other Code.org tutorials, by presenting you with a problem domain and a task. In this case, there's this sympathetic Swedish coder Jens, presenting us the Code.org Minecraft world and the fact that the World Has Stopped. Your task is to bring the animals back to life by coding. Like this:


Now this is a simple idea and there was nothing new really: a simple 2D world and the familiar programming blocks that are similar to the ones we've used earlierly in Scratch and other Code.org Tutorials. Yet, when I showed this to my older daughter, it totally captivated her. I had to read here the English instructions, like "The chicken is frozen. Place move and turn blocks in the when spawned slot to get it to work. I checked if there's a Finnish translation but it was very much lacking at the time.

Anyway, she had a very good drive and quickly steamed through the 11 assignments, animating chickens with loops, randomness and sound, learning about events by making sheep drop wool when "used" and so on. The best part was yet to come, though!

The 12th assignment is in fact a full-blown game editor, where you can make different creatures appear at different times and positions and freely code their behaviour by dragging code into their event slots, like this:


Here, for instance, the Zombies chase the player and attack when touched. The Iron Golems, on the other hand, chase the zombies. Until morning, that is. That's when it explodes!

This freeform editor thing totally really hooked by daughter into designing her game and having the creatures do a lot of funny things. Chickens laying carrots instead of eggs was good fun!

She also made a nicer version of here game for her little sister, who was scared of the zombies. In that version, the zombies are nice and actually a bit scared of sheep, which was a lot of fun to watch.

Better yet, you can also save your work and share it as a mobile-friendly web page. Try it yourself! You can go directly to the editor here. After running your game, click the Finish button, then share the URL that's presented to you. Then you can get back to editing the game. Each time you click the Finish button, you'll get a new URL.

In conclusion, this was by far the most enjoyable tutorial from Code.org so far. I've never seen my kids so thrilled about coding!

Oh, and do you want to try (a version of) the game my daugther made? Try here. Use arrow keys to move and spacebar to attack/use. Wait until nightfall to see the zombies, creepers and iron golems. Have fun!

Wednesday, September 28, 2016

Kid 2, Teaching the Teachers

I started the Girls Can't Code blog about 3 years ago with my 4-year old. Now I have another 4-year old who can't use Vim yet, a kind of a clean slate if you like. Should I teach her Vim or Emacs? Start with the command-line or go for Scratch to begin with?

I have to admit that she's already exposed to some coding stuff though: we've played the Robogem board together quite a few times. That doesn't make her a coder yet, and she can't read or write much yet but certainly shows interest in learning to do so, so I think this is a good time to start pounding the keyboard.

Today we kinda started that by launching the lovely Bubble Bobble game on our good old Commodore 64.


I've put a sticker with instructions for starting games on the machine, so it was just a matter of writing exactly as the paper said. But it takes some effort to find all the keys on the keyboard and to type the quote characters which require you to hold Shift while pressing the key. She made it the first time though and got the game running. She's playing with her big sister as I'm writing this.

Btw we did a little Turtle Roy refresher with Big Sis couple of days ago. She had forgot most of her mad skillz since we haven't been doing our computer lessons too often lately. We still have our little Egg Alert game project to complete. If I remember correctly, we have some images scanned and uploaded to Scratch. Hope so, as her computer (old Macbook Pro) broke down and she has to use mine for now.

Oh and yesterday I went to the Kilonpuisto School to teach programming to the teachers. That was good fun and I got a lot of positive feedback along the lines of "I'm no longer scared of coding now that I got to try it". There's a lot of work to be done now that programming is a part of the national curriculum in Finnish schools, while the teachers are still mostly clueless on how to teach something they know mostly nothing about. But like the teachers discovered yesterday, coding is not rocket science; anyone can learn the basics and have fun doing so. 

Which probably applies to rocket science as well. Good luck Mr Elon Musk, I hope you get to Mars one day and come back alive, too!


Sunday, May 8, 2016

Moomins Teach Coding - Wait What?

If there’s one Finnish brand that will never expire, it’s got to be the Moomins. I read the same Moomin stories to my kids that my mom read to me. Also, every Finn seems to have a dozen of Moomin cups in their cupboard. You just cannot avoid them. I’m not sure if I’ve ever bought a single one, but I have like 5, which is probably below average. If you don’t buy them yourself, your mom or your friend will buy them for you.


So, when the Moomins start to teach coding, that’s not something to be taken lightly. And guess what I heard? Well it happens that my Japanese colleagues at Reaktor are organizing a Moomin Code School in Tokyo next Saturday. I was lucky to have a sneak peek at what they’re gonna give to the kids, so I took the "Moomin IDE” for a test drive with my daughter.


Things look up for the Moomins: the coding environment seems already pretty solid: it’s like Scratch but more focused and easier to use. You can learn the basics of programming, like command sequences, loops, even defining your own functions by dragging colorful blocks around. I would love to use this environment in my code schools too, before stepping into more hardcore stuff, that is.

My 7-year old coder girl picked up the Moomin IDE instantly. No wonder, because she’s already used Scratch and the layout is familiar. She easily threw together a program that draws a square and then, with a little help, named it “square” using one of the blocks in the "procedures" palette. This way a new block named "square" appeared in the palette. Using the newly made "square" block, she then made a program that draws a square 360 times, rotating just a little between repetions. The result was an awesome black ball! Too bad there’s no “change color” block yet, so we had to go back to Turtle Roy to make the Japanese flag:


Here’s our Turtle Roy drawing that draws the flag, btw: http://turtle-roy.herokuapp.com/?turtle=JRfxSaA8mI

Regarding the Moomin Code School event, I’m damn jealous it’s in Japan! Would love to see what’s up. Is the Moominpappa himself a hardcore hacker nowadays? Which one of the Moomin characters do you think will be the best coder? If I was looking for a Senior Moomin Architect, I’d probably hire this guy "Snork". If I was looking for a hacker-type I'd go for Little My.

little-my
Snork and Little My


The set of characters is just so juicy that I cannot wait for the Moomin Code School to land in Finland some day too. 

Here’s a link to the Moomin Code School event page: http://moomincodingschool.com/. There are instructions for joining on the page, in Japanese. So if you’re in Japan, I insist you go there and tell me what happened!


Monday, February 22, 2016

The Stuff that Coders Do

Greetings from wintery Finland! And sorry for being lazy on the blog. I'll try to get a grip on this:) We have indeed been coding every now and then, but mostly doing other stuff. Let's talk about the other stuff this time. Next post will be programming related, I promise.

So, what do coder girls do when they're not coding?

Well, they might play some Bubble Bobble on the Commodore 64. The kids can now connect the computer, disc drive and all the wires and use the "command line" to load games. The old Commodore is one of the favorite activities around here. There's just something magical about the machine and Bubble Bobble. Below, you can see someone hypnotized by the graphics shown while the game is loading.


But one should not stare too much into plasmas, LCDs and LEDs right? That's bad for the eyes. And the brain needs some fresh air too. So, we ride ponies!


Well, that was more like a one-shot activity but will not be soon forgotten. At home, the kids love ponies too. They watch them on YouTube and make their own, too. These things are a bit freaky though, huh?


One of our latest dad-daughter activities has been recording music in the home studio. Older sister can now pretty much operate GarageBand on her own and record the lovely voice of the 4-year old. Both the girls have been coming up with songs of their own and I really want to capture those for future listening. You can never get that 4-year-old voice back you know.


The bigger kid can also read and write notes to some extent, so she writes her stuff down while talking with granma on the phone.

So that kind of stuff.

Meanwhile I've been also been teaching programming to kids in Koodikoulu (Code School) events and was honored to have the Finnish president. It was pretty cute that he wore the same kind of name tag as the kids had:


You can read more about Koodikoulu on the Reaktor blog.

Next up: more board game development. See you soon!

Saturday, November 7, 2015

Robogem - The Evolution of a Board Game

A bit more than a year ago I took my first shot at designing a board game that teaches programming. It was fun but the game didn't really work too well. I still like the idea, but ideas don't turn into good games too easily, I've found out...

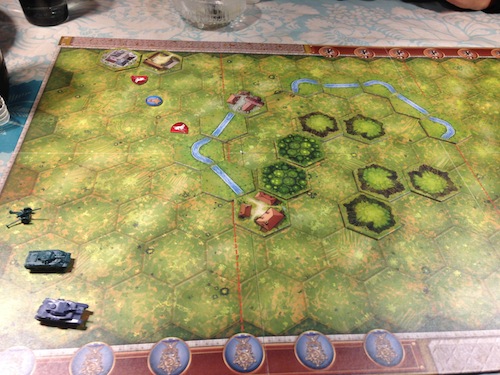
Soon I got the Robot Turtles board game and after some playing decided that it's not fun enough. I want games with action and fierce competition! I asked my kids opinions and they agreed: they want to compete against each other. So I started experimenting for a new game. The idea was that the players commanded tanks by making command sequences out of command cards. The game quickly from a co-operative search-and-destroy game to a competitive race.

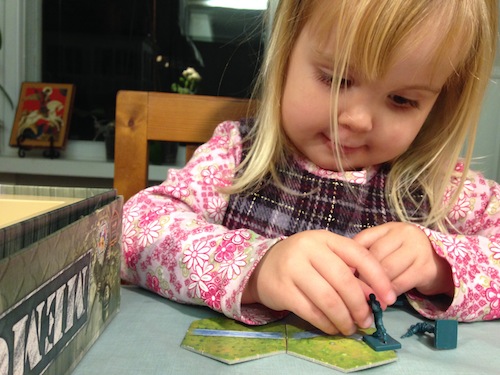
The players raced each other on a hex board using the command cards (forward, left, right). Each player got to add or remove commands to their command sequence, which was repeated on each turn. So, you could either go fast by accumulating more cards to your sequence, or proceed more carefully. We used game assets from any available board games on my shelf.


The game was kind of fun, but was not very well balanced. You could easily drive yourself to a corner and it would take a long time to replace your program with something that will take you back on track. We changed the mechanism of adding/removing cards to a persistent program to one where you had a bunch a cards in your hand and could play any number of cards per turn. Then fill your hand back to 5 cards. That was nice until we discovered that unuseful cards will keep accumulating in your hand, because you play the better ones away.

Level design was very hard and the starting turn was too decisive. The hex board also made making full 180 turns quite tedious. Furthermore, the game was a bit dull, because it was quite linear; not many choices to make. Game design is not easy, I had to admit again. Still, I was convinced that I had a good idea and could make it work by applying my scientist skills. I was indeed keeping a very detailed diary of my observations and insights.

But So, after several iterations of changes, including laser guns of course, I decided to try something else. Treasure hunt it was!


So instead of racing through a track the objective was now to fetch 3 treasures from the board. This gave the players more alternative ways of winning: there are more than enough treasures on the board. Also, because there are more alternatives, the problem of "bad" cards accumulating to your hand got less irritating.

Then my daughter (5 years at the time) told me a new set of rules: you have to fetch a treasure from the sea and return that to "home". Also, if you push another player who currently has the treasure, the treasure is transferred 
to you. It naturally involved lasers that you could use to remove obstacles. The ideas of stealing treasures from your opponents and returning the treasure back home turned out to be a fun combination. Meanwhile, my younger kid was designing her own game.


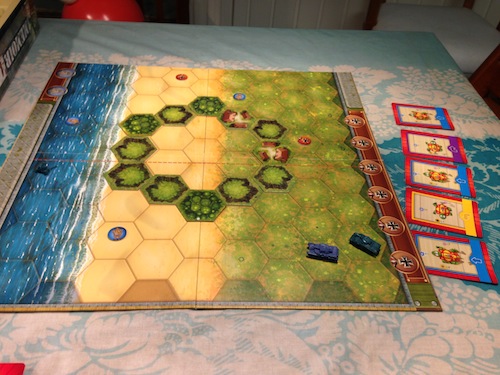
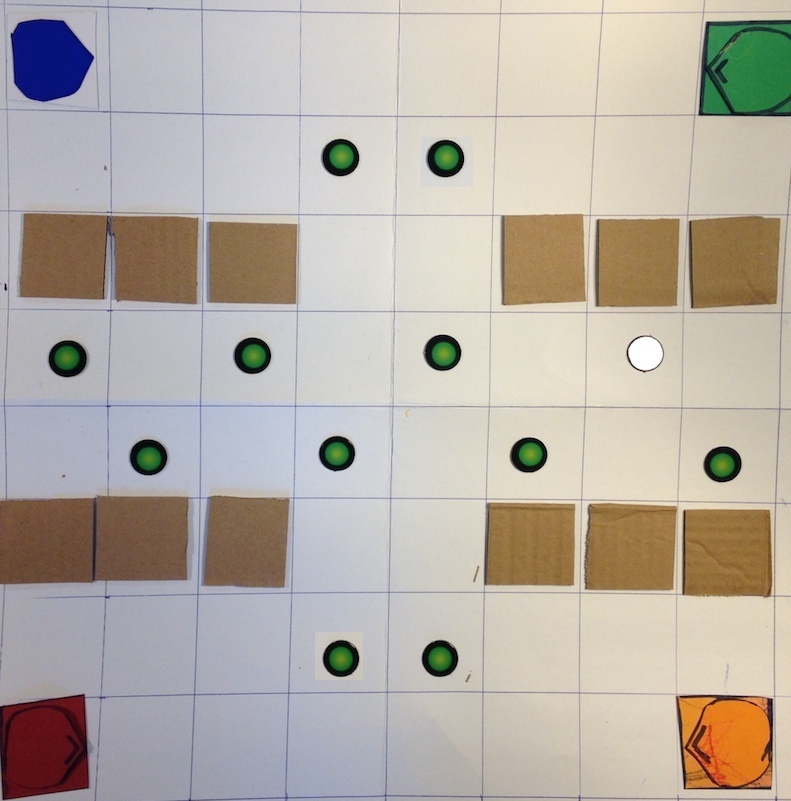
We tried tens of variations of the treasure hunt game. Then we tried it on a rectangular board instead, to find the rectangular board worked better, because in a treasure hunt with opponents, you need to make a 180 degree turn every now and then. And it's also generally easier to play than a hex board. We tried loads different obstacle layouts and then found this one to be very good:


In fact, we never found a better one later, except for changes to the number and positions of the treasures.

We were still experimenting with different card-playing systems, including one where you could either build/modify your program with new cards or run it. Yet, a simple mechanism where you always get a completely new hand of cards after each turn turned out to be more fun. So I picked a game mechanism where you get 5 new cards for each turn and you play 0-5 cards on your turn, discarding the rest.I also decided that all players' cards should be visible. This gives you the opportunity to take others' cards into account when planning your strategy. You might think that having all cards visible would make the game simpler or more predictable but it's in fact the other way around: strategic players have much more variables to take into account. Yet, it gets easier for young children, because the older ones can easily advise them when the cards are in the open.

After about 1 month of active game design and dozens and dozens of iterations I finally had the feeling that we have a fun and simple game. I had the first set of game rules written down. I had simplified the game as much as possible, to make the rules easy to learn even for small kids. 

After signing a publishing deal (!) it took us a couple of months to finalize the game rules. This involved many rounds of testing with different groups of people, involving relatives and colleagues and their respective children. Minor modifications to the rules were tried and improvements were made.

I never explained the game rules to anyone. Instead they had to read the rulebook and start playing. It went quite well in general, but resulted in rulebook improvements of course. And this was an ugly rulebook with hand-drawn illustrations of course. Like this:


It also took some time to decide on the final game theme and the name. The tanks were ruled out pretty quick. We wanted to emphasize coding to some extent but still primarily make the game feel exciting and fun. It should be cool for both girls and boys. It should be easily applied to different languages and cultures. We finally landed on colorful and playful robots landing on a distant planet, in search of colorful diamonds.


Then, like a frog turning to a prince, the cardboard monstrosity turned into something beautiful. I was blown away by the first graphic designs made by Mikko Hiltunen for the game. I haven't got those at hand right now, but here's the pretty much final box design.


So now we had a working but ugly game and beautiful game asset designs on the computer. You can imagine it felt like a lifetime to wait for the ready products to be shipped. And that it was amazing to finally lay our hands on the finished product. And it was super! To me it looked even better than I had hoped for. And the game assets (robots, diamonds and the board) are good quality and nice to use. The diamonds fit the slots on top of the robots and everything feels solid.

And now the game is available both online and in many Finnish stores! It was pretty cool to see our game in the local supermarket.


Please have a look at the gameplay video and the rulebook online! 


You can buy the game and have it shipped to Europe and the U.S at least, for a reasonable cost. We are still looking for distrubutors worldwide, to have Robogem in the board game boutiques, supermarkets and bookstores all around the world.

It's been an exciting voyage so far, starting from learning vim and writing a few blog posts to actually being able a board game around the world. Now let's see if people like our game and we get to make more games. In fact, I'm already working on something new :)

Sunday, September 20, 2015

Talking Moose

Lately I've been fooling around with Bluetooth speakers so I suggested that we take some of my daughters toys and make it talk. She was obviously very excited. Imagine if someone suggested this when you were a kid. I'd personally had gone nuts. Well, she chose her dear Moose. 

So I went to buy a cheap'n'small bluetooth speaker for 17 euros and we started by makingthe bluetooth speaker talk using the Mac's fabulous say command line tool. First we connected the Bluetooth speaker by fiddling with the Mac's Bluetooth preferences. After that, the speaker is ready to use. Now, when you type something like

    say "Hello world"

You'll hear speech from the bluetooth speaker. There's even a bunch of different voices available and you can add more from the Text-to-speech preferences. For the Finnish language, there's a nice voice called Mikko. To use a specific voice, you do like

    say -v Mikko "Huomenta Suomi!"

And it was fun, once again. We've played with the say command before, but now the sound comes from a different box, so it was even more fun. Even our 3-year-old made the box talk. She can type her own name and learning more words every day.


Then I suggested we break the bluetooth speaker to pieces, just for the heck of it. And sure we did. We found a lithium battery, a circuit board and a speaker element. And I do find my daughter to be much like me when I was a kid. I always broke things to pieces and usually was unable to put them back together. We, however succeeded also at putting the speaker back together too. And yes, we tried if it works when in pieces too.


Later today, she came back and asked whether we are going to make the moose talk. And we stuffed the speaker into the Moose's butt. Now it speaks. Through its butt. Great! We even added some velcro so that you can close the gap and hide the electronics. And open it to recharge the speaker via USB.

By the way, you can actually connect several bluetooth speakers to your Mac. And you can address each of the individually using the -a parameter of the say command. What this mean in practise is that you can make a theatrical play with several soft toys speaking (through their butts) with different voices, by programming! 

MUST BUY MOAR BLUETOOTH SPEAKERS!!!

Monday, September 14, 2015

Hello Ruby!

A while ago we got mail.

The long-awaited Hello Ruby book by Linda Liukas arrived! We read it as a good-night story the same night and both the girls (6 and 3 years) seemed to love it. Even with about 60 pages of story, it was an easy and quick read and even the 3-year old was all ears and had no problem concentrating. 

I was expecting a bit more "programming" in the story though. There are references to algorithmic thinking (Ruby thinks like a programmer), but without extra explaining, the kids won't notice that. The references to Python, Django, Snowleopard, Androids et al are also cute but don't ring any bells to small kids. Not sure that it makes sense to add that kind of a layer on the story.

Nevertheless, the most fun part in the book are the excercises though. From page 65 or so starts a "workbook" (not sure about the wording as my book's in Finnish) section, which is a real treasure chest full of fun and graphical programming exercises that you can do without a computer. This is the section that makes the book twice worth its price even if there wasn't a story at all!

Working on the 1st exercise

The exercises may seem simplistic, but at least for my quite-a-bit experienced 6-year old coder girl, they were just perfect. Easy and fun. We covered the first three exercises in half an hour or so. The first exercise was about writing written instructions for stuff like eating breakfast. Below there are the 6-year old's instructions. She even managed to make a loop to make sure that all the oatmeal gets eaten. She wasn't sure how you make a loop in this Finnish pseudo-language, and asked me how to "make a repeat" in Finnish, as she didn't know the right "coding words" in her mother tongue.


The exercises involve not just writing step-by-step procedures, but also breaking things into parts, boolean logic and so on. As an extra, she got to draw Ruby in her weekend costume, the rules of which she had to write in exercise three. You can probably guess the rules from the picture?

And how about the 3-year old? She was busy too, and also drew a picture of Ruby.


Ruby pictured by 3-year old artist

So, Ruby is not just cute, but smart too. Well done, Linda!

Tuesday, May 26, 2015

The Milatron

We haven't coded much lately. Seems that she's interested in hardware at the moment :) And stuff like sports and music. With regard to music, we've been building a thing I call Milatron.

It's a custom electric instrument that we designed earlier (see my previous post). The idea is that we use an Arduino microcontroller to produce different sounds through a speaker, when you press one of the 8 colored buttons. Simple enough. We found a suitable cookie box to use as the chassis and decided to use a 4 inch speaker element which is way too heavy for our use but later on proved to be a good choice.

First, we had to measure, draw and cut a hole to the chassis for the speaker, and install the speaker with bolts. She did most of the hard work, of course.


Then it was time to drill holes for the keys. At this point you could already see that this thing is gonna look awesome. 

She installed the keys mostly by herself and did all the soldering too. She just loves soldering!  

We added the Arduino and a breadboard inside. The breadboard had a sticker surface on its bottom so it could be nicely fitted on top of the speaker. At first I added a resistor between the Arduino and the speaker to turn down the volume a bit. Later we replaced the resistor with a potentiometer so that you can adjust the volume to your liking.


We installed a 9 volt battery which is held in place by the huge magnet of the speaker. So the big speaker turned out quite handy in many ways. It also gives the gadget a considerable weight, so it doesn't feel like your average children's toy.

Here's the Milatron now. It's tuned in D major and makes terrible noise. It even has kind of a polyphony. 


We did some experiments with software-generated sound before we started working on the actual instrument though. But I decided writing the actual Milatron software myself, because generating waveforms with different, accurate pitches isn't actually trivial. A bit too much for a 6 year old, I'm afraid. I think the main thing is that she knows it can be done.

All in all, we spent something like 3 nights working on this. Good times! And the monstrosity is still in active use, a few weeks after its birth. We are planning on adding extra features like pitch bending later... 

Maybe I should post a video of how it sounds?